
Project Run & Play week 5 - Holiday wear. As I told you last week, I finally joined in on the Project Run & Play sew along. Last week was boys week (I entered my Lego Man Shirt) and this week is Holiday Wear. I was actually really excited this was the topic, since I had this idea in my head, and this gave me a push to realize it.
See, I am planning a little trip with Littleheart, to go see my family in the States. We will be spending Thanksgiving with my sister. A few weeks ago, my sister sent me a picture of a little turkey outfit she got my nephew for the occasion, thinking it might be a little tacky, but I loved the idea of dressing up for Thanksgiving, and told her I would make Littleheart something to match!
The only problem is, we don't celebrate thanksgiving here is Israel, and turkeys don't really have any meaning here. So I thought I better come up with something that could be used after thanksgiving too....
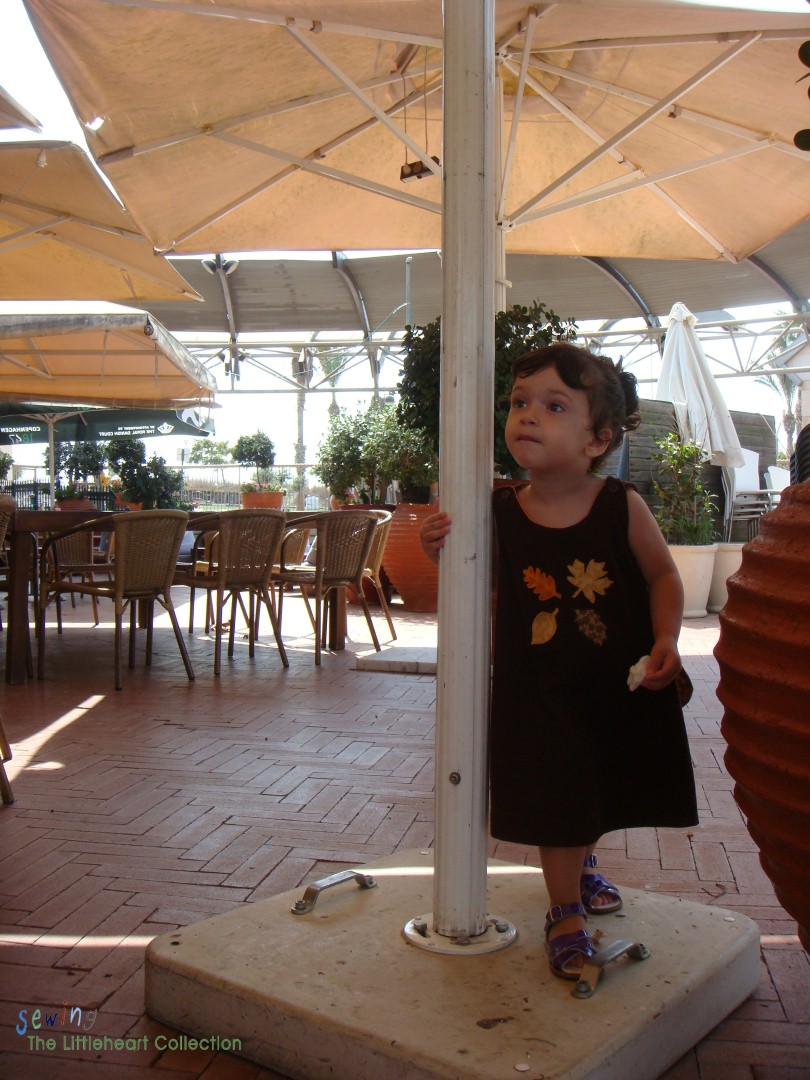
And this is what I came up with...The thanksgiving jumper with a removable turkey tail that turns into a ruffle! The jumper turned out just what I imagined, and I am really excited for Littleheart to wear it for thanksgiving. And hey, she even let me do a photo session in the park (she is wearing it without anything under it, since it is still hot here, but the idea is to wear a long sleeve shirt under it).
Here are a few detail pictures. I love the pleats in the back!


This jumper is actually a refashion from a corduroy skirt I haven't worn in years, but I will explain how to make it from scratch, since I assume most of you do not own the same corduroy skirt :)
What you will need:
- Brown corduroy material
- Scraps of brown, yellow and orange cotton material
- Double sided fusible interfacing
- Scraps of one-sided fusible interfacing
- Jumper pattern (I used this one from Ikatbag)
- Leafs, Feathers and tail template (download here)
- 10 snaps
- 2 buttons
Cutting
- Cut your facing pieces according to the pattern, out of one of your cotton materials.
- Cut out four tail pieces out of your brown corduroy.
- Cut out 4 feather pieces out of each of your three cotton fabrics.
- Cut your front jumper piece out of your brown corduroy material.
- Take your back jumper pattern and trace it to a new piece of paper, starting 3 inches away from the fold. You need these extra inches to make your pleats. Now cut your new back jumper piece from your brown corduroy material. You could also just leave out the pleats, and cut out the back piece from the original pattern.

Sewing
Trace your leafs templates to the paper side of your double sided fusible interfacing. Now iron them to the wrong side of your scraps of fabric. You can make all the leafs the same color, or use different colors. I made two yellow, one brown and one orange.

Cut out your leafs and iron them onto your front jumper piece, forming a circle like this:

Now sew around each leaf with a narrow zigzag stitch. I used matching thread for each leaf, but if you don't feel like changing your thread each time, you could just go with brown.

Now make your pleats in the back. Take your back piece and mark the middle. Then mark one inch to each side of the middle mark. Then mark three more marks on each side, each one 1 inch away from the last. In total you should now have 6 marks (without the middle mark).
Now pin your pleats in place. Starting with your mark furthest to the right, fold it over half an inch to the left and pin. Do the 3 right pleats in this manner. Then go to your furthest to the left and fold it over half an inch to the right. Do the other 2 pleats in this manner. You should now have three pleats folded to the left and three folded to the right. Now sew down your pleats, about two inches from the edge of your neckline. Don't forget to backstitch to secure them in place. (for pictures go to my pleated neck shirt, it is the same concept).
Now sew together your jumper using the tutorial from Ikatbag here.
Now we are going to make the tail:
Take two tail pieces and pin them right sides together. Sew along the top edges (marked white).


Now you are going to make the feathers. Cut out 6 feather pieces out of your one-sided interfacing and iron them to 6 feather pieces (2 of each fabric). Make the interfacing pieces about half an inch smaller all around.
Now take two feather pieces (same color - one with interfacing and one without) and pin them right sides together. Sew around the entire piece, leaving the bottom (straight line across) open. Flip it right sides out, iron and topstitch around. Repeat this for the other 5 feathers.


Now take one of your tail pieces and mark the middle. Arrange all your feather pieces so that one is on top, the next on bottom (see picture). Make sure you sandwich your feather pieces between the front and back of tail piece.

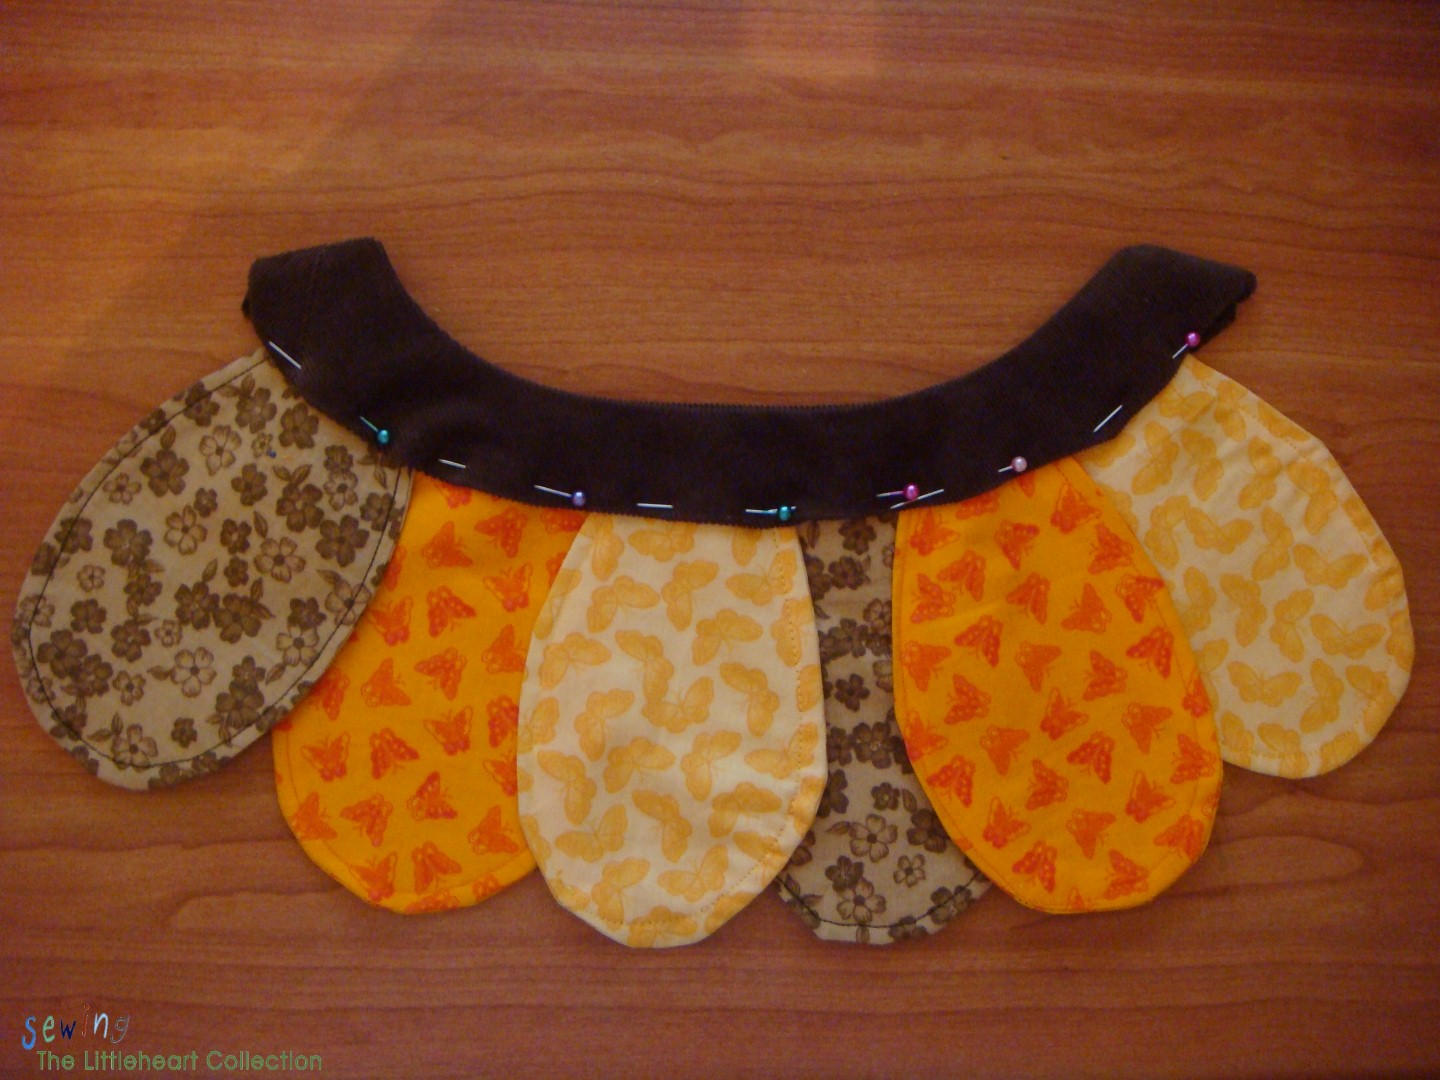
Sew along the lower edge of the tail, making sure you secure all the feather pieces.


Snap on your snaps, using a snap pliers or sew on simple snaps. It is a bit tricky to put the snaps on, since they go in the middle of the jumper, and you need to fold up the material to get there. If it isn't working, use sew on snaps. Just make sure you sew them on really well.
Your turkey tail is done.
Now if you want to make the ruffle attachment for after thanksgiving, take two strips of one of your cotton fabrics, one about 4" wide and the other 8" wide, and 17 " long. Fold them in half and press. Then ruffle the top, using your largest stitch (for a good tutorial on ruffles, go here).
Sandwich the ruffles between the second tail piece, the narrow one on top of the wider one, and pin in place. Stitch across the bottom of the tail piece. Sew on the snaps in the same distances as the turkey tail and voila! You have your extra ruffle piece (sorry no step by step pictures).

Here are some picture from our little photo shoot:


Happy Thanksgiving!
I will be linking up to some of the link parties on this page and will be entering the Project Run & Play sew along.

I must tell you that this is a Very different idea .. Very Cute Mira.. I always love to add comments when I read your posts .. but the word verification is too complex , it takes multiple times to get it right :(!!
ReplyDeleteSeriously? My sister said the same thing! How do I change it?
DeleteI think I took it out now...
DeleteHow adorable! I wish I knew how to sew! I'm hosting an It's Fall Y'all ~ Linky Party. I would love for you to stop by and share this project, and any other Fall project, you may have. Hope to see you there :)
ReplyDeleteAdorable jumper! I'd love for you to share this jumper and any other crafts at my new linky party, Submarine Sunday. I hope you'll stop by!
ReplyDeleteT'onna
http://navywifeypeters.blogspot.com/2012/10/submarine-sunday-1-linky-party_7.html
This is just adorable!
ReplyDeleteI love this and the model too!
ReplyDeleteOh goodness that is just adorable and I love your little one's sweet smile! You have such a cute model.
ReplyDeleteThank you Katie!
DeleteThis is so wonderful! What a fun idea. I think this may have just made the top of my thanksgiving outfit plans for her. Thanks for the full tutorial! Your model is very sweet :) Safe travels!
ReplyDeleteThanks Rachel, let me know how it turns out!
DeleteThat is so cute! Love the tail!
ReplyDeleteVisiting from Simply Sweet Home!
So cute! I also love the tail and that it's detachable. Visiting from Strut Your Stuff Sat.
ReplyDeletehttp://kaminskiscreations.blogspot.com
That is just the most adorable idea! Your little model obviously loves it too :) Saw your link at Sew Country Chick.
ReplyDelete<3 Christina at I Gotta Create!
Wildly Original linky party is open.
Such a cute, fun idea!!! Love the colours.
ReplyDeleteThis is awesome! Thanks for sharing.
ReplyDeletewww.blissfulsewing.blogspot.com
Oh my! Adorable! Now this is a reason to want a daughter! :)
ReplyDeleteHa! You could make it into overalls and it could be for a boy too! Not the ruffle though...would have to think of something else instead....
DeleteMira - That is the sweetest jumper I've ever seen! Thank you for sharing the tutorial at my place. xo Jami
ReplyDeleteThanks for the feedback Jami!
DeleteOh My... this is soooo cute, I LOVE the wee tail!!
ReplyDeleteSuper cute, and very creative. Love it!
ReplyDeleteThis is absolutely darling! Saw your link at Threading My Way and I'm your newest follower! CUTE DRESS!!!
ReplyDelete